Stable Diffusion を Tensorflow-metal で実行して絵を生成する

以前のエントリーで PyTorch と Diffusers ライブラリを使って Stable Diffusion を使いました。 TensorFlow でも Stable Diffusion できる ことがわかったので、備忘録として書き残します。 tensorflow-metal を使うことで TensorFlow を M1 macbook air などの Apple silicon 搭載マシンの GPU を使って実行できます。
こちらの方法 Conda なしで Stable Diffusion する(Diffusers ライブラリを使用)M1 mac と Linux + CUDA でも、Apple silicon の GPU を活かして Stable Diffusion を動かすことができますが、 コードをそれように変更する必要がありました。 一方で、tensorflow-metal では Tensorflow にプラグインする形なので、 コード変更が不要です。 単に tensorflow-metal のモジュールをインストールしておきさえすれば、GPU 対応になり処理が速くなる、という仕組みです。
詳細については以下を参照ください。
事前準備
venv 環境を作ります。
$ python3 --version
Python 3.9.6

$ python3 -m venv ~/venv-tf-metal
$ source ~/venv-tf-meta/bin/activate
(venv-tf-metal) $
必要なモジュールを入れます。
(venv-tf-metal) $ pip install tensorflow==2.13.0
(venv-tf-metal) $ pip install tensorflow-metal
(venv-tf-metal) $ pip install keras_cv
(venv-tf-metal) $ pip install keras_core
(venv-tf-metal) $ pip install pillow
絵の生成コード
A cup of coffee, plain background, high quality, highly detailed, elegant, art by Gauguin. というプロンプトで 絵を生成してみます。
main.py
from PIL import Image
import keras_cv
from tensorflow import keras

prompt = "A cup of coffee, plain background, high quality, highly detailed, elegant, art by Gauguin."

#model = keras_cv.models.StableDiffusion(img_width=512, img_height=512)
model = keras_cv.models.StableDiffusion(img_width=360, img_height=360)

#images = model.text_to_image(prompt, batch_size=3)
images = model.text_to_image(prompt, batch_size=1)

for i in range(len(images)):
    image = images[i]
    print( type(image) ) # <class 'numpy.ndarray'>
    print( image.shape ) # (512, 512, 3)
    img = Image.fromarray(image, 'RGB')
    img.save( "r_" + str(i) + ".png" )

keras.backend.clear_session()
model.text_to_image() の結果生成される images は numpy の ndarray です。
実行します。
(venv-tf-metal) $ python main.py
画像サイズを 512 x 512 指定で実行すると手元の M1 macbook air では 8分程度かかりました。 画像サイズを 360 x 360 指定では 3分程度で生成できました。
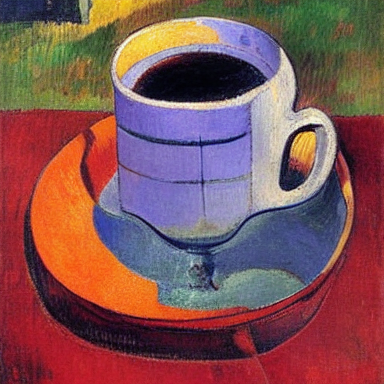
この画像も冒頭の画像も同じプロンプトで生成させたものです。 seed値を固定していないので、毎回異なる絵ができます。 おそらくは、 model.text_to_image() に seed値を渡すなりすることにより、 seed値を固定できるのではないか?と思いますが、わかりません。そのうち調べます。
まとめ
CUDA 対応のGPUを使ったほうがまだまだ断然生成時間は短いのですが、 手元にあるマシンでさっと生成できるというアドバンテージは大きいです。 将来の M3 マックなどでは実用に耐えうるスピードになっていくのでしょうか。
Liked some of this entry? Buy me a coffee, please.