Stable Diffusion などを使って絵をつくるワークフロー
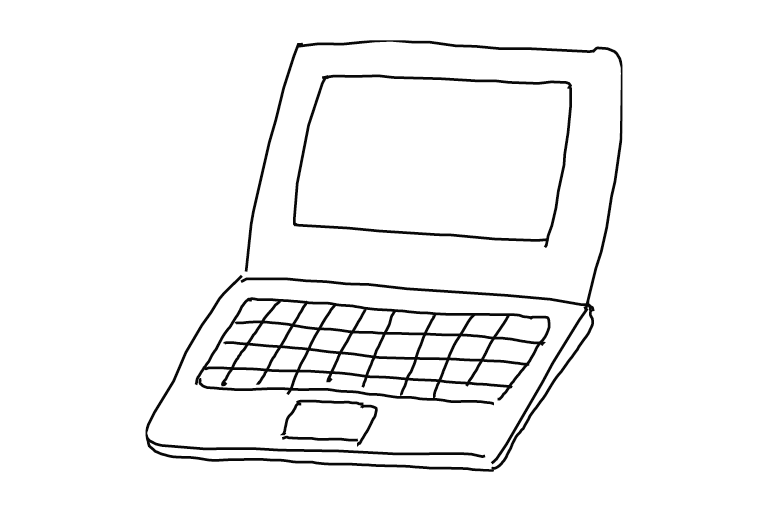
手描きの線画から Stable Diffiusion とその周辺ツールを使って絵を作るワークフローのまとめです。 全体像はこんな感じ。
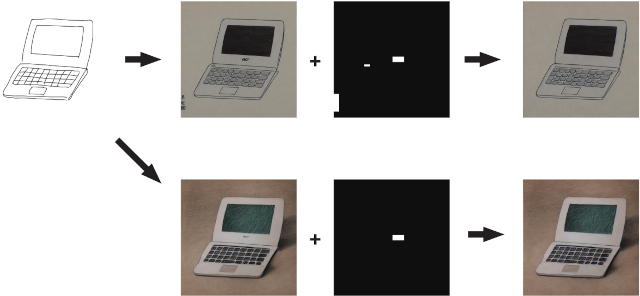
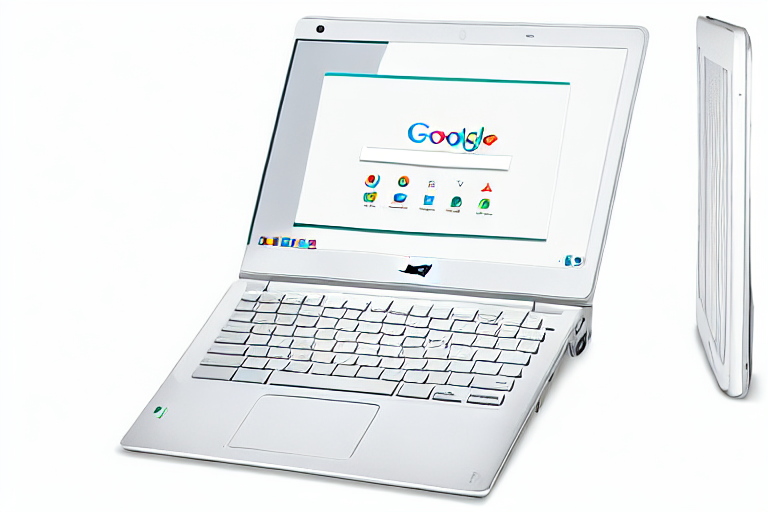
完成した絵
コントロールネットと inpaiting 機能を使って手描きの線画から絵をつくりました。
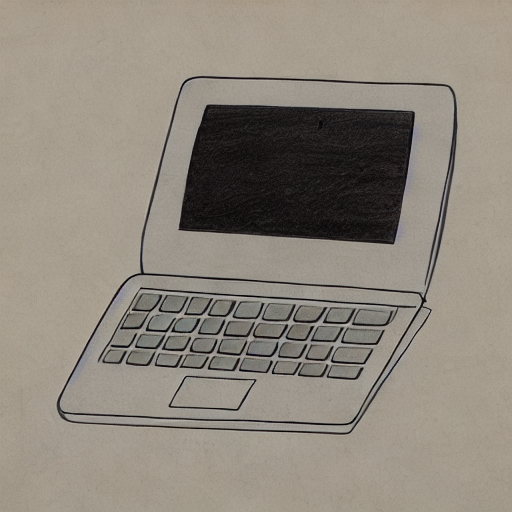
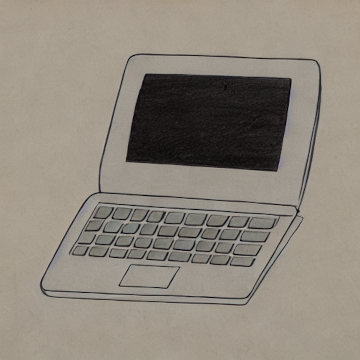
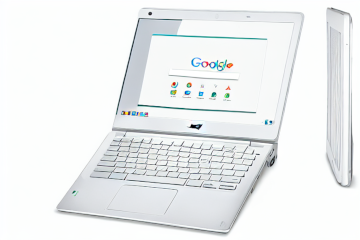
Monotone pencil drawing art by Hokusai ( cb311_mono_512x512.png )
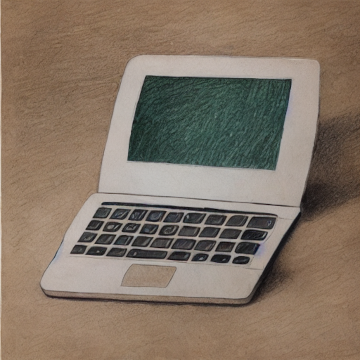
Color pencil drawing art by Leonardo DaVinci ( cb311_color_512x512.png )
手順(概要)
今回実際には、元絵から2つの絵をつくりましたが、 以下では、モノクロの方を例に生成手順を説明します。
Step 1
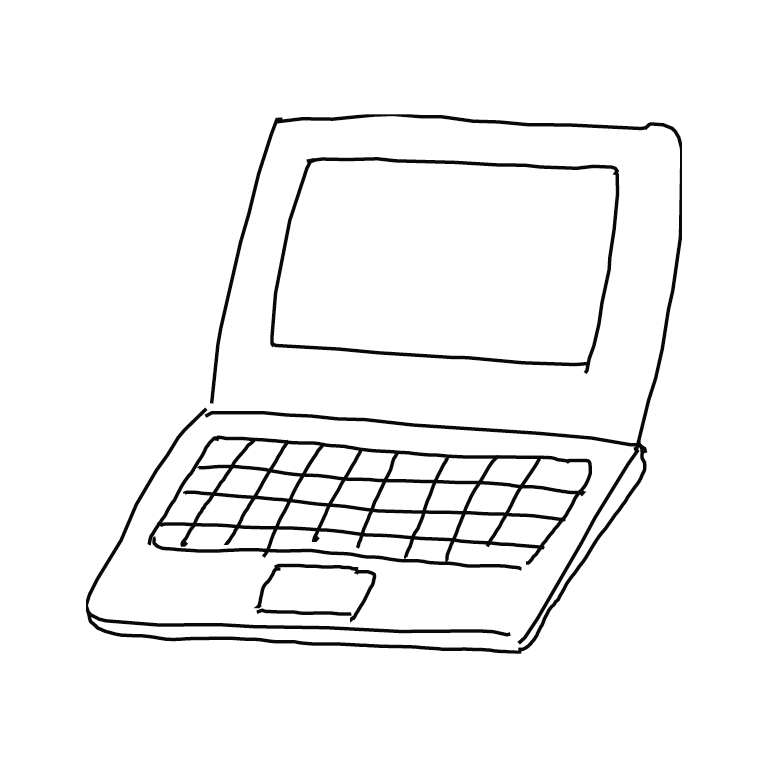
元にした絵 cb311_src_768x768.png はこれです。

元絵はこちらのツール で作成。
この画像をプロンプトともにコントロールネットを使って絵を作り出します。 プロンプトやシード値を調整して気に入った絵ができたら保存しておきます。

元絵には何もロゴマークいれていないのに、液晶画面の下にロゴが生成された。 ACR (Acerではないが遠目には ACERにしか見えない) と出力されている。 これは prompt に An Acer Chomebook... と書いたからだと思う。
Step 2
不要な部分を inpaiting 機能を使って描き直しするためのマスク画像を用意します。 消したい部分(ラップトップ正面のロゴっぽい何か / 左のサイン / キーボード左上に出現した電源ボタン)を白塗りした矩形領域を設定してマスクとします。 残りは現状のまま変更しないので、その領域は黒で塗ります。 cb311_mask_mono_768x768.png

このマスク画像と Step1 で生成した画像 cb311_tmp_mono_768x768.png を使って、inpaiting を行います。
inpaint するときにプロンプトも与えますが、 今回は単になりゆきで消したいだけなので、空文字列を使っています。
inpaint 処理の結果以下のが画像が生成されます。cb311_mono_512x512.png
これで完成です。
手順(詳細)
Step1
元の絵からコントロールネット使って絵をつくります。
以前のエントリーに書いたとおりですが、簡単に説明します。
GPUが使える環境を用意します。 Python のバージョンは 3.8.17 を使用しました。
$ python --version
Python 3.8.17
その上で、venv 環境をつくってそこに必要なモジュールを入れます。
$ python -m venv ~/.local/venv-stable-diffusion
$ source ~/.local/venv-stable-diffusion/bin/activate
$ pip install diffusers transformers ftfy accelerate
$ touch step1.py
step1.py の内容:
import os
import sys
import torch
import requests
from PIL import Image, ImageOps
from io import BytesIO
from diffusers import StableDiffusionControlNetPipeline, ControlNetModel

def load_image(image_file_path):
    with open(image_file_path, "rb") as f:
        image = Image.open(f).convert("RGB")
    return image


device = "cuda"
ct_model_id = "lllyasviel/sd-controlnet-scribble"
sd_model_id = "runwayml/stable-diffusion-v1-5"

prompt = ""
input_image_file  = "input.png"
output_image_file = "output.png"
seed = 42

args = sys.argv

if len(args)==4:
    prompt = args[1]
    input_image_file  = args[2]
    output_image_file = args[3]

if len(args)==5:
    prompt = args[1]
    input_image_file  = args[2]
    output_image_file = args[3]
    seed = int(args[4])

valid = os.path.exists(input_image_file)


if valid :
    controlnet = ControlNetModel.from_pretrained(
        ct_model_id,
        torch_dtype=torch.float16)

    pipe = StableDiffusionControlNetPipeline.from_pretrained(
        sd_model_id,
        controlnet=controlnet,
        torch_dtype=torch.float16).to(device)

    # Recommended if your computer has < 64 GB of RAM
    pipe.enable_attention_slicing()


    init_image = load_image(input_image_file)
    init_image_inverted = ImageOps.invert(init_image)
    #init_image_inverted.thumbnail((768, 768))

    generator = torch.Generator(device=device).manual_seed(seed)

    image = pipe(
        prompt=prompt,
        image=init_image_inverted,
        guidance_scale=7.5,
        generator=generator).images[0]

    image.save(output_image_file)
想定されている入力画像サイズは 768 x 768 です。今回はそのサイズちょうど入力画像を作成。
入力画像 cb311_src_768x768.png を カレントディレクトリに配置した上で以下を実行。
$ python step1.py \
    "An Acer Chromebook, with acer logo, dark body color, plain background, by monotone pencil drawing art by Hokusai." \
    cb311_src_768x768.png \
    cb311_tmp_mono_768x768.png \
    43
処理が終了するとカレントディレクトリに cb311_tmp_mono_768x768.png が生成されます。
Step2
次に生成された画像を修正します。 気に入らなかったので書き直してほしい部分をマスク画像として指定し、それを使って最終的な画像を生成します。
Inpainting の詳細は過去のエントリー「Stable Diffusion で足りない背景を描き足す」を参照のこと
cb311_tmp_mono_768x768.png 画像をもとにして、同じ画像サイズで、マスク画像 cb311_mask_mono_768x768.png を用意して カレントディレクトリに保存します。
inpainting のためのコードを準備します。
$ touch step2.py
step2.py の内容:
import os
import sys
import requests
import torch
from PIL import Image
from io import BytesIO
from diffusers import StableDiffusionInpaintPipeline

def load_image(image_file_path):
    with open(image_file_path, "rb") as f:
        image = Image.open(f).convert("RGB")
    return image

device = "cuda"
sd_inpainting_model_id = "runwayml/stable-diffusion-inpainting"

prompt = ""
input_image_file       = "input.png"
input_mask_image_file  = "input_mask.png"
output_image_file      = "output.png"

args = sys.argv

if len(args)==4:
    input_image_file  = args[1]
    input_mask_image_file  = args[2]
    output_image_file = args[3]

valid = (os.path.exists(input_image_file) and os.path.exists(input_mask_image_file))

if valid:
    pipeline = StableDiffusionInpaintPipeline.from_pretrained(
        sd_inpainting_model_id,
        torch_dtype=torch.float16,
    ).to(device)

    init_image = load_image(input_image_file)
    mask_image = load_image(input_mask_image_file)

    image = pipeline(prompt=prompt, image=init_image, mask_image=mask_image).images[0]

    image.save(output_image_file)
実行します。
$ python step2.py \
    cb311_tmp_mono_768x768.png \
    cb311_mask_mono_768x768.png \
    cb311_mono_512x512.png
結果が cb311_mono_512x512.png に生成されます。
768 x 768 サイズの画像を入力として出力画像のサイズは 512 x 512 なので、入力画像サイズも 512 x 512 が求められているのかもしれない。 ただこれで問題なく機能しているので、おそらく内部で入力画像を然るべきサイズにリサイズしてくれているのであろう。(要確認)
簡単に再実行できるように Makefile を書いておきます。
prompt:= "An Acer Chromebook, with acer logo, dark body color, plain background, by monotone pencil drawing art by Hokusai."


cb311_mono_512x512.png: cb311_tmp_mono_768x768.png cb311_mask_mono_768x768.png
	python step2.py $^ $@


cb311_tmp_mono_768x768.png: cb311_src_768x768.png
	python step1.py $(prompt) $< $@ 43

clean:
	rm -f cb311_tmp_mono_768x768.png
	rm -f cb311_mono_512x512.png
まとめ
簡単な線画からそこそこな絵を作り出すことができました。 GPUマシンでないと処理できないというのがボトルネックです。
M1 macbook air でも試したのですが、一度の変換で 50分近くかかる上に最後の最後でエラーになり、うまくいきませんでした。 最後に出たエラーの検証のためにまた 50分費やす気にはなれない。 さらに、これは step1.py の処理だけで 50分なので、step2.py まで含めると一回の試行で 相当な時間がかかります。 たった一度だけ実行するのであればまだしも、プロンプトを工夫するために複数回実行したい、となればもうこれは無理。 ちなみに GPU では 30秒程度で処理が完了します。Step2 まで含めて 1分程度でしょう。
一応、将来 M3 マックなどでは現実的な時間で動くかもしれないので、 CPU版の step1.py の差分を記録しておきます。
patch.txt
--- step1.py	2023-08-24 16:59:13.859673867 +0900
+++ step1.py.cpu	2023-08-24 17:05:18.593673889 +0900
@@ -12,7 +12,7 @@
     return image


-device = "cuda"
+device = "cpu"
 ct_model_id = "lllyasviel/sd-controlnet-scribble"
 sd_model_id = "runwayml/stable-diffusion-v1-5"

@@ -39,13 +39,11 @@

 if valid :
     controlnet = ControlNetModel.from_pretrained(
-        ct_model_id,
-        torch_dtype=torch.float16)
+        ct_model_id)

     pipe = StableDiffusionControlNetPipeline.from_pretrained(
         sd_model_id,
-        controlnet=controlnet,
-        torch_dtype=torch.float16).to(device)
+        controlnet=controlnet).to(device)

     # Recommended if your computer has < 64 GB of RAM
     pipe.enable_attention_slicing()
追伸 img2img を試す
先程は手描きデータをコントロールネットを使って変換(生成)しましたが、 代わりに img2img を使ってみます。
img2img の詳細はこちらをご覧ください。
元絵は先程の手描きの絵と同じですが、サイズを 768 x 512 に変更しました。 cb311_src_768x512.png これを img2img.py を使って変換します。
img2img.py
import os
import sys
import torch
from PIL import Image
from io import BytesIO
from diffusers import StableDiffusionImg2ImgPipeline

def load_image(image_file_path):
    with open(image_file_path, "rb") as f:
        image = Image.open(f).convert("RGB")
    return image

device = "cuda"

sd_model_id = "runwayml/stable-diffusion-v1-5"

seed = 50
prompt = ""
input_image_file  = "input.png"
output_image_file = "output.png"


args = sys.argv

if len(args)==5:
    prompt            = args[1]
    input_image_file  = args[2]
    output_image_file = args[3]
    seed              = int(args[4])

valid = os.path.exists(input_image_file)

if valid :
    pipe = StableDiffusionImg2ImgPipeline.from_pretrained(sd_model_id, torch_dtype=torch.float16)
    pipe = pipe.to(device)

    init_image = load_image(input_image_file)
    init_image = init_image.resize((768, 512))

    generator = torch.Generator(device=device).manual_seed(seed)

    images = pipe(
        prompt=prompt,
        image=init_image,
        strength=0.75,
        guidance_scale=7.5,
        generator=generator).images

    images[0].save(output_image_file)
実行:
$ python img2img.py "An Acer Chromebook" cb311_src_768x512.png cb311_mono_768x512_img2img.png 50
生成された画像:
cb311_mono_768x512_img2img.png
Liked some of this entry? Buy me a coffee, please.