簡単なエディタをつくる試み lexical を調べる(その1)
lexicalのミニマムスタート。
このページ Getting Started with React の内容をやってみた備忘録です。
環境の確認
$ npm --version
10.2.3
$ node --version
v20.10.0
my-text-editor プロジェクトを React 用にセットアップ
$ mkdir my-text-editor
$ cd my-text-editor
$ npm init -y
まず React 系モジュールを入れます。
$ npm install --save react react-dom
--save-dev 関係
$ npm install --save-dev @babel/core @babel/preset-env @babel/preset-react babel-loader
$ npm install --save-dev webpack webpack-cli
この辺は、 Reactハンズオンラーニング第二版 を参考にしています。
この段階での package.json を確認。
{
  "name": "my-text-editor",
  "version": "1.0.0",
  "description": "",
  "main": "index.js",
  "scripts": {
    "test": "echo \"Error: no test specified\" && exit 1"
  },
  "keywords": [],
  "author": "",
  "license": "ISC",
  "dependencies": {
    "react": "^18.2.0",
    "react-dom": "^18.2.0"
  },
  "devDependencies": {
    "@babel/core": "^7.23.6",
    "@babel/preset-env": "^7.23.6",
    "@babel/preset-react": "^7.23.3",
    "babel-loader": "^9.1.3",
    "webpack": "^5.89.0",
    "webpack-cli": "^5.1.4"
  }
}
babel と webpack の設定ファイルを用意。
babel.config.json
{
    "presets": ["@babel/preset-env", "@babel/preset-react"]
}
webpack.config.js
var path = require("path");

module.exports = {
    entry: "./src/index.js",
    output: {
        path: path.join(__dirname, "dist"),
        filename: "editor.js"
    },
    module: {
        rules: [
            {
                test: /\.js/,
                exclude: /node_modules/,
                loader: "babel-loader"
            }
        ]
    }
};
src/index.js にコードを書いてバンドルした成果物を ./dist/editor.js に出力する設定です。
プレースフォルダとしてのディレクトリとファイルを用意。
$ mkdir src
$ touch src/index.js
$ mkdir dist
$ touch dist/index.html
dist/index.html が SPA としてのページで、ここから dist/editor.js を使います。
dist/index.html の内容を次のようにします。
<!DOCTYPE html>
<html>
  <head>
    <meta charset="utf-8" />
    <title>my text editor</title>
  </head>
  <body>
    <div id="root"></div>
    <script src="./editor.js"></script>
  </body>
</html>
次に、 src/index.js を用意します。
import React from 'react';
import {createRoot} from 'react-dom/client';

function Editor() {
  return (
    <p>Hello, World!</p>
  );
}

const container = document.getElementById('root');
const root = createRoot(container);
root.render(<Editor />);
src/index.js から dist/editor.js を生成します。
$ npx webpack --mode development
これで dist/editor.js が生成されます。
今後 npm run build でこれが実行できるように、package.json に記述しておきましょう。
package.json 抜粋:
  "scripts": {
    "build": "webpack --mode development"
  },
それでは、作動を確認。 ここでは python3 を使います。 ./dist/ をルートとしてwebサーバを起動。
$ python3 -m http.server 8000 --directory dist
ブラウザで http://localhost:8000/ にアクセスします。
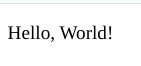
うまく Hello, World! できました。
この段階でのプロジェクトのファイル構成を確認しておきます。
.
├── babel.config.json
├── dist
│   ├── editor.js
│   └── index.html
├── node_modules/...
├── package.json
├── package-lock.json
├── src
│   └── index.js
└── webpack.config.js
node_modules/ 以下に大量にファイルがありますが、それは省いています。
lexical
本題の lexical を入れます。
$ npm install --save lexical @lexical/react
現在の package.json は次のようになっています。
{
  "name": "my-text-editor",
  "version": "1.0.0",
  "description": "",
  "main": "index.js",
  "scripts": {
    "build": "webpack --mode development"
  },
  "keywords": [],
  "author": "",
  "license": "ISC",
  "dependencies": {
    "@lexical/react": "^0.12.5",
    "lexical": "^0.12.5",
    "react": "^18.2.0",
    "react-dom": "^18.2.0"
  },
  "devDependencies": {
    "@babel/core": "^7.23.6",
    "@babel/preset-env": "^7.23.6",
    "@babel/preset-react": "^7.23.3",
    "babel-loader": "^9.1.3",
    "webpack": "^5.89.0",
    "webpack-cli": "^5.1.4"
  }
}
それでは、いよいよこのページ Getting Started with Reactを参考に lexical でエディタをつくります。
src/index.js
import React from 'react';
import {createRoot} from 'react-dom/client';

import {$getRoot, $getSelection} from 'lexical';
import {useEffect, useState} from 'react';

import {LexicalComposer} from '@lexical/react/LexicalComposer';
import {PlainTextPlugin} from '@lexical/react/LexicalPlainTextPlugin';
import {ContentEditable} from '@lexical/react/LexicalContentEditable';
import {HistoryPlugin} from '@lexical/react/LexicalHistoryPlugin';
//import {OnChangePlugin} from '@lexical/react/LexicalOnChangePlugin';
import {useLexicalComposerContext} from '@lexical/react/LexicalComposerContext';
import LexicalErrorBoundary from '@lexical/react/LexicalErrorBoundary';


const theme = {
  paragraph: 'editor-paragraph'
};

function MyCustomAutoFocusPlugin() {
  const [editor] = useLexicalComposerContext();

  useEffect(() => {
    // Focus the editor when the effect fires!
    editor.focus();
  }, [editor]);

  return null;
}

function onError(error) {
  console.error(error);
}

function OnChangePlugin({ onChange }) {
  const [editor] = useLexicalComposerContext();
  useEffect(() => {
    return editor.registerUpdateListener(({editorState}) => {
      onChange(editorState);
    });
  }, [editor, onChange]);
}

function Editor() {
  const initialConfig = {
    namespace: 'MyEditor',
    theme,
    onError,
  };

  const [editorState, setEditorState] = useState();
  function onChange(editorState) {
    setEditorState(editorState);
  }

  return (
    <LexicalComposer initialConfig={initialConfig}>
      <PlainTextPlugin
        contentEditable={<ContentEditable />}
        placeholder={<div className="editor-placeholder">Enter some text...</div>}
        ErrorBoundary={LexicalErrorBoundary}
      />
      <HistoryPlugin />
      <MyCustomAutoFocusPlugin />
      <OnChangePlugin onChange={onChange}/>
    </LexicalComposer>
  );
}

const container = document.getElementById('root');
const root = createRoot(container);
root.render(<Editor />);
内容は、ほぼ、 このページ Getting Started with React と同じなので、詳細は説明しません。
あえて言及するとすれば、 最後の部分のコードにより、index.html で root という id を指して 用意している div 要素 に lexical の Editor を適用している部分でしょうか。
このように書きます。(というか Hello, Workd!のときといっしょですが。)
const container = document.getElementById('root');
const root = createRoot(container);
root.render(<Editor />);
それでは、 変換 npm run build して、webサーバを起動 python3 -m http.server 8000 --directory dist ブラウザで実行してみます。
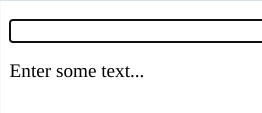
できました。
Enter some text... の部分が本来は実際にテキストを入力するエディタ部分(ボーダーで囲われた部分)に来てほしいのですが、その下になっているのが気になりますね。 調整しましょう。
Enter some text... を発生させているのは、次のコードの部分です。
placeholder={<div className="editor-placeholder">Enter some text...</div>}
editor-placeholder というクラス名の div 要素にこの Enter some text... が出現するようになっているので、この div 要素をちょうどよい位置になるように CSSで指定します。
dist/index.html
<!DOCTYPE html>
<html>
  <head>
    <meta charset="utf-8" />
    <title>my text editor</title>
    <style>
body {
  margin:0;
  padding:0;
}
div {
  margin:0;
  padding:0;
}
.editor-paragraph {
  padding:0;
  margin:0;
  font-size:14pt;
}
.editor-placeholder {
  position: absolute;
  top: 2px;
  left: 2px;
  user-select: none;
  pointer-events: none;
  font-size:14pt;
  overflow: hidden;
}
        </style>
  </head>
  <body>
    <div id="root"></div>
    <script src="./editor.js"></script>
  </body>
</html>
<style>...</sytle> 部分で指定して位置あわせをしています。 デフォルトの margin, padding があると位置がわかりずらくなるので、 いったん body, div 要素は それらを 0 に設定しています。
.editor-paragraph というのは、index.js の先頭部分で指定していたものです。
const theme = {
  paragraph: 'editor-paragraph'
};
エディタ内で文字を入力したときのパラグラフのCSSクラス名をここで指定していました。 これも margin, padding ともに 0 にしています。 (当然、必要であれば適切な値にすればよいです、今は Enter some text... の位置あわせを簡単にするために 0 にリセットしているだけです。)
そして肝心の editor-placeholder に対するスタイルの指定です。
.editor-placeholder {
  position: absolute;
  top: 2px;
  left: 2px;
  user-select: none;
  pointer-events: none;
  font-size:14pt;
  overflow: hidden;
}
position を absolute にすることで、絶対位置指定で出現位置をきめています。
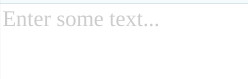
これで再度実行すれば:

このように、ちょうど入力すべき場所に Enter some text... の文言がオーバーレイします。 (文字色を薄く CCCCCC くらいにしておきべきでしたね。) まあ一応できました。
さらに、 ボーダーで囲われた部分がエディタとしてテキスト入力できる部分なのですが、 キャレットが見えない(これはボーダーと重なっているだけなのだが)ので これも調整します。
これは lexical が作り出す contenteditable="true" の 要素に対して CSSで outline: none; 指定すればいいのですが、 指し方がわからない! Stackoverflow で、index.js の次の部分に直接 style 指定せよ、という回答があったので、 それを採用しました。
contentEditable={<ContentEditable style={{ outline: 'none' }} />}
これで実行してみると・・・
できました。
左上すぎるのと、キャレットは出てもボーダーが表示されないと、どこが入力領域がわかりずらいので、 そのあたりを調整します。
dist/index.html
    <div id="myeditor">
      <div id="root"></div>
    </div>
lexical のエディタが出現する root 部分を囲む div 要素 id='myeditor' を用意。 この myeditor に対してボーダーつきのスタイルをセットします。
dist/index.html
#myeditor {
  margin: 30px;
  border: solid 1px #333;
}
margin を 30px にしたので、エディタ部分が今まで (0,0) の位置からはじまっていたのが、 (30,30) の位置に移動します。
したがって、絶対位置していで、位置あわせしていた Enter some text... に対する スタイル指定も その分平行移動してください。translate ( +30, +30 ) する。
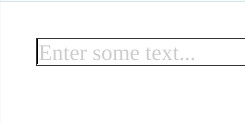
ようやくエディタらしくなりました。
まとめ
最後に完成した index.html と index.js を掲載します。
dist/index.html
<!DOCTYPE html>
<html>
  <head>
    <meta charset="utf-8" />
    <title>my text editor</title>
    <style>
body {
  margin:0;
  padding:0;
}
div {
  margin:0;
  padding:0;
}
#myeditor {
  margin: 30px;
  border: solid 1px #333;
}
.editor-paragraph {
  padding:0;
  margin:0;
  font-size:14pt;
}
.editor-placeholder {
  position: absolute;
  top: 32px;
  left: 32px;
  user-select: none;
  pointer-events: none;
  font-size:14pt;
  color: #cccccc;
  overflow: hidden;
}
    </style>
  </head>
  <body>
    <div id="myeditor">
      <div id="root"></div>
    </div>
    <script src="./editor.js"></script>
  </body>
</html>
src/index.js
import React from 'react';
import {createRoot} from 'react-dom/client';

import {$getRoot, $getSelection} from 'lexical';
import {useEffect, useState} from 'react';

import {LexicalComposer} from '@lexical/react/LexicalComposer';
import {PlainTextPlugin} from '@lexical/react/LexicalPlainTextPlugin';
import {ContentEditable} from '@lexical/react/LexicalContentEditable';
import {HistoryPlugin} from '@lexical/react/LexicalHistoryPlugin';
//import {OnChangePlugin} from '@lexical/react/LexicalOnChangePlugin';
import {useLexicalComposerContext} from '@lexical/react/LexicalComposerContext';
import LexicalErrorBoundary from '@lexical/react/LexicalErrorBoundary';


const theme = {
  paragraph: 'editor-paragraph'
};

function MyCustomAutoFocusPlugin() {
  const [editor] = useLexicalComposerContext();

  useEffect(() => {
    // Focus the editor when the effect fires!
    editor.focus();
  }, [editor]);

  return null;
}

function onError(error) {
  console.error(error);
}

function OnChangePlugin({ onChange }) {
  const [editor] = useLexicalComposerContext();
  useEffect(() => {
    return editor.registerUpdateListener(({editorState}) => {
      onChange(editorState);
    });
  }, [editor, onChange]);
}

function Editor() {
  const initialConfig = {
    namespace: 'MyEditor',
    theme,
    onError,
  };

  const [editorState, setEditorState] = useState();
  function onChange(editorState) {
    setEditorState(editorState);
  }

  return (
    <LexicalComposer initialConfig={initialConfig}>
      <PlainTextPlugin
        contentEditable={<ContentEditable style={{ outline: 'none' }} />}
        placeholder={<div className="editor-placeholder">Enter some text...</div>}
        ErrorBoundary={LexicalErrorBoundary}
      />
      <HistoryPlugin />
      <MyCustomAutoFocusPlugin />
      <OnChangePlugin onChange={onChange}/>
    </LexicalComposer>
  );
}

const container = document.getElementById('root');
const root = createRoot(container);
root.render(<Editor />);
まだ lexical を使ってテキスト入力できるようになっただけなので、 今後、ここに初期テキストをセットしたり、編集結果をサーバに送って保存したり、 といった方法を調べる予定です。
Liked some of this entry? Buy me a coffee, please.